Reverse Sear Meat Mastery: The Ultimate Guide
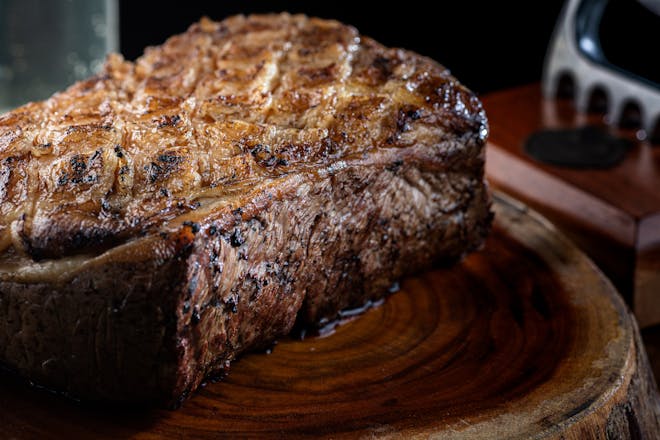
When it comes to preparing the perfect steak or roast, the reverse sear meat technique is a game-changer for home cooks and professional chefs alike. This method, which involves a low-temperature cook followed by a high-heat sear, ensures even cooking and a juicy interior with a beautifully caramelized crust.
The Science Behind Reverse Sear Meat
The reverse sear method flips traditional cooking wisdom on its head. Traditionally, a steak is seared at high temperatures to develop a crust, then transferred to a lower heat to finish cooking. Reverse searing, however, starts by slowly bringing the meat up to temperature in a low oven or smoker, and finishing with a quick sear on a hot pan or grill.
This technique allows for precise temperature control, making it easier to achieve a perfectly cooked interior without overcooking the outer layers. The low and slow phase of cooking breaks down tough muscle fibers, resulting in a tender texture throughout.
Choosing Your Cut for Reverse Sear
While reverse searing can be applied to many types of meat, it works best with thicker cuts such as ribeye, porterhouse, or filet mignon. A minimum thickness of 1.5 inches is ideal for this method to shine. For roasts, prime rib or a beef tenderloin are excellent choices.
Step-by-Step Guide to Reverse Sear
1. Seasoning Your Meat
Begin by liberally seasoning your meat with salt and any other desired spices. Salt is crucial as it not only adds flavor but also helps to retain moisture during cooking.
2. Low-Temperature Cooking
Preheat your oven or smoker to a low temperature – around 200-275°F (93-135°C). Place your seasoned meat on a rack over a baking sheet to allow air circulation. Cooking times will vary depending on the size and thickness of the meat, but a probe thermometer is your best friend here. Aim for an internal temperature of 10-15 degrees below your target doneness.
3. The Searing Finale
Once your meat reaches the desired internal temperature, remove it from the oven and let it rest while you preheat a skillet or grill to high heat. Sear the meat for 1-2 minutes per side, creating that coveted crust. Be sure to sear the edges for a complete crust all around.
4. Resting Your Meat
After searing, let your meat rest for a few minutes. This allows the juices to redistribute, ensuring a moist and flavorful bite.
Troubleshooting Common Reverse Sear Issues
One of the biggest challenges with reverse searing is timing. If your meat is seared too long during the final step, it can surpass the target temperature. Always use a meat thermometer and keep a close eye during the searing process.
Another issue is the lack of a proper sear. This can be due to insufficient heat or too much moisture on the surface of the meat. Make sure your pan or grill is screaming hot, and pat the meat dry before searing.
Final Thoughts on Mastering Reverse Sear
The reverse sear method is a powerful tool in any cook’s arsenal. By understanding the science behind it and following the steps outlined, you can achieve restaurant-quality results in your own kitchen. Experiment with different seasonings and cuts to find your personal favorite reverse sear meat preparation.
